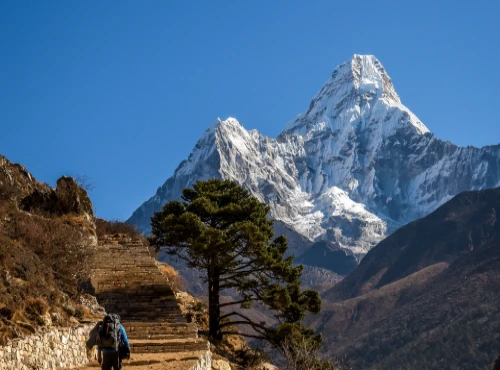
Peak climbing is where trekking begins to turn into mountaineering. Learn what first-time climbers should realistically expect, how to choose a suitable peak, and what preparation is needed before attempting a Himalayan summit.
Peak Climbing in Nepal: A Complete Guide for First-Time Climbers
Table of Contents
For many trekkers, peak climbing begins with one simple question: what comes after trekking?
After walking through the Himalayas, crossing high passes, and seeing snow-covered mountains up close, you may start wondering what it would feel like to stand on an actual summit.
Nepal offers several peaks for people with good trekking fitness or previous high-altitude experience but little technical climbing experience.
However, beginner-friendly does not mean easy. Peak climbing still involves long days at altitude, cold conditions, an early summit start, and the use of basic mountaineering equipment.
This guide explains what peak climbing in Nepal involves, which peaks may suit first-time climbers, how to prepare, what equipment and permits you need, and what to expect on summit day.
By the end, you should have a clearer idea of whether peak climbing is the right next step for you.
Quick Answer: Can a Beginner Climb a Peak in Nepal?
Yes, beginners can climb certain peaks in Nepal, even without previous technical climbing experience.
You should have:
- Good trekking fitness
- Experience walking for several days
- Enough time to acclimatise
- Basic climbing training before the summit
- Confidence following your guide’s safety decisions
Beginner-friendly does not mean easy. Altitude, weather, route conditions, and the length of summit day can still make the climb demanding.
What Is Peak Climbing in Nepal?
Peak climbing in Nepal refers to climbing Himalayan peaks that fall between high-altitude trekking and full mountaineering expeditions.
These mountains are commonly around 5,500 to 6,500 meters high, although some are slightly higher. Unlike a regular trek, the main objective is to reach the summit. Depending on the route, climbers may need crampons, ropes, a harness, an ice axe, and basic mountaineering skills.
However, a peak’s official classification depends on its permit category, not only its height. The Nepal Mountaineering Association lists the peaks under its management.
What Does Peak Climbing in Nepal Actually Involve?
Peak climbing in Nepal usually combines several days of trekking with a basic mountaineering experience.
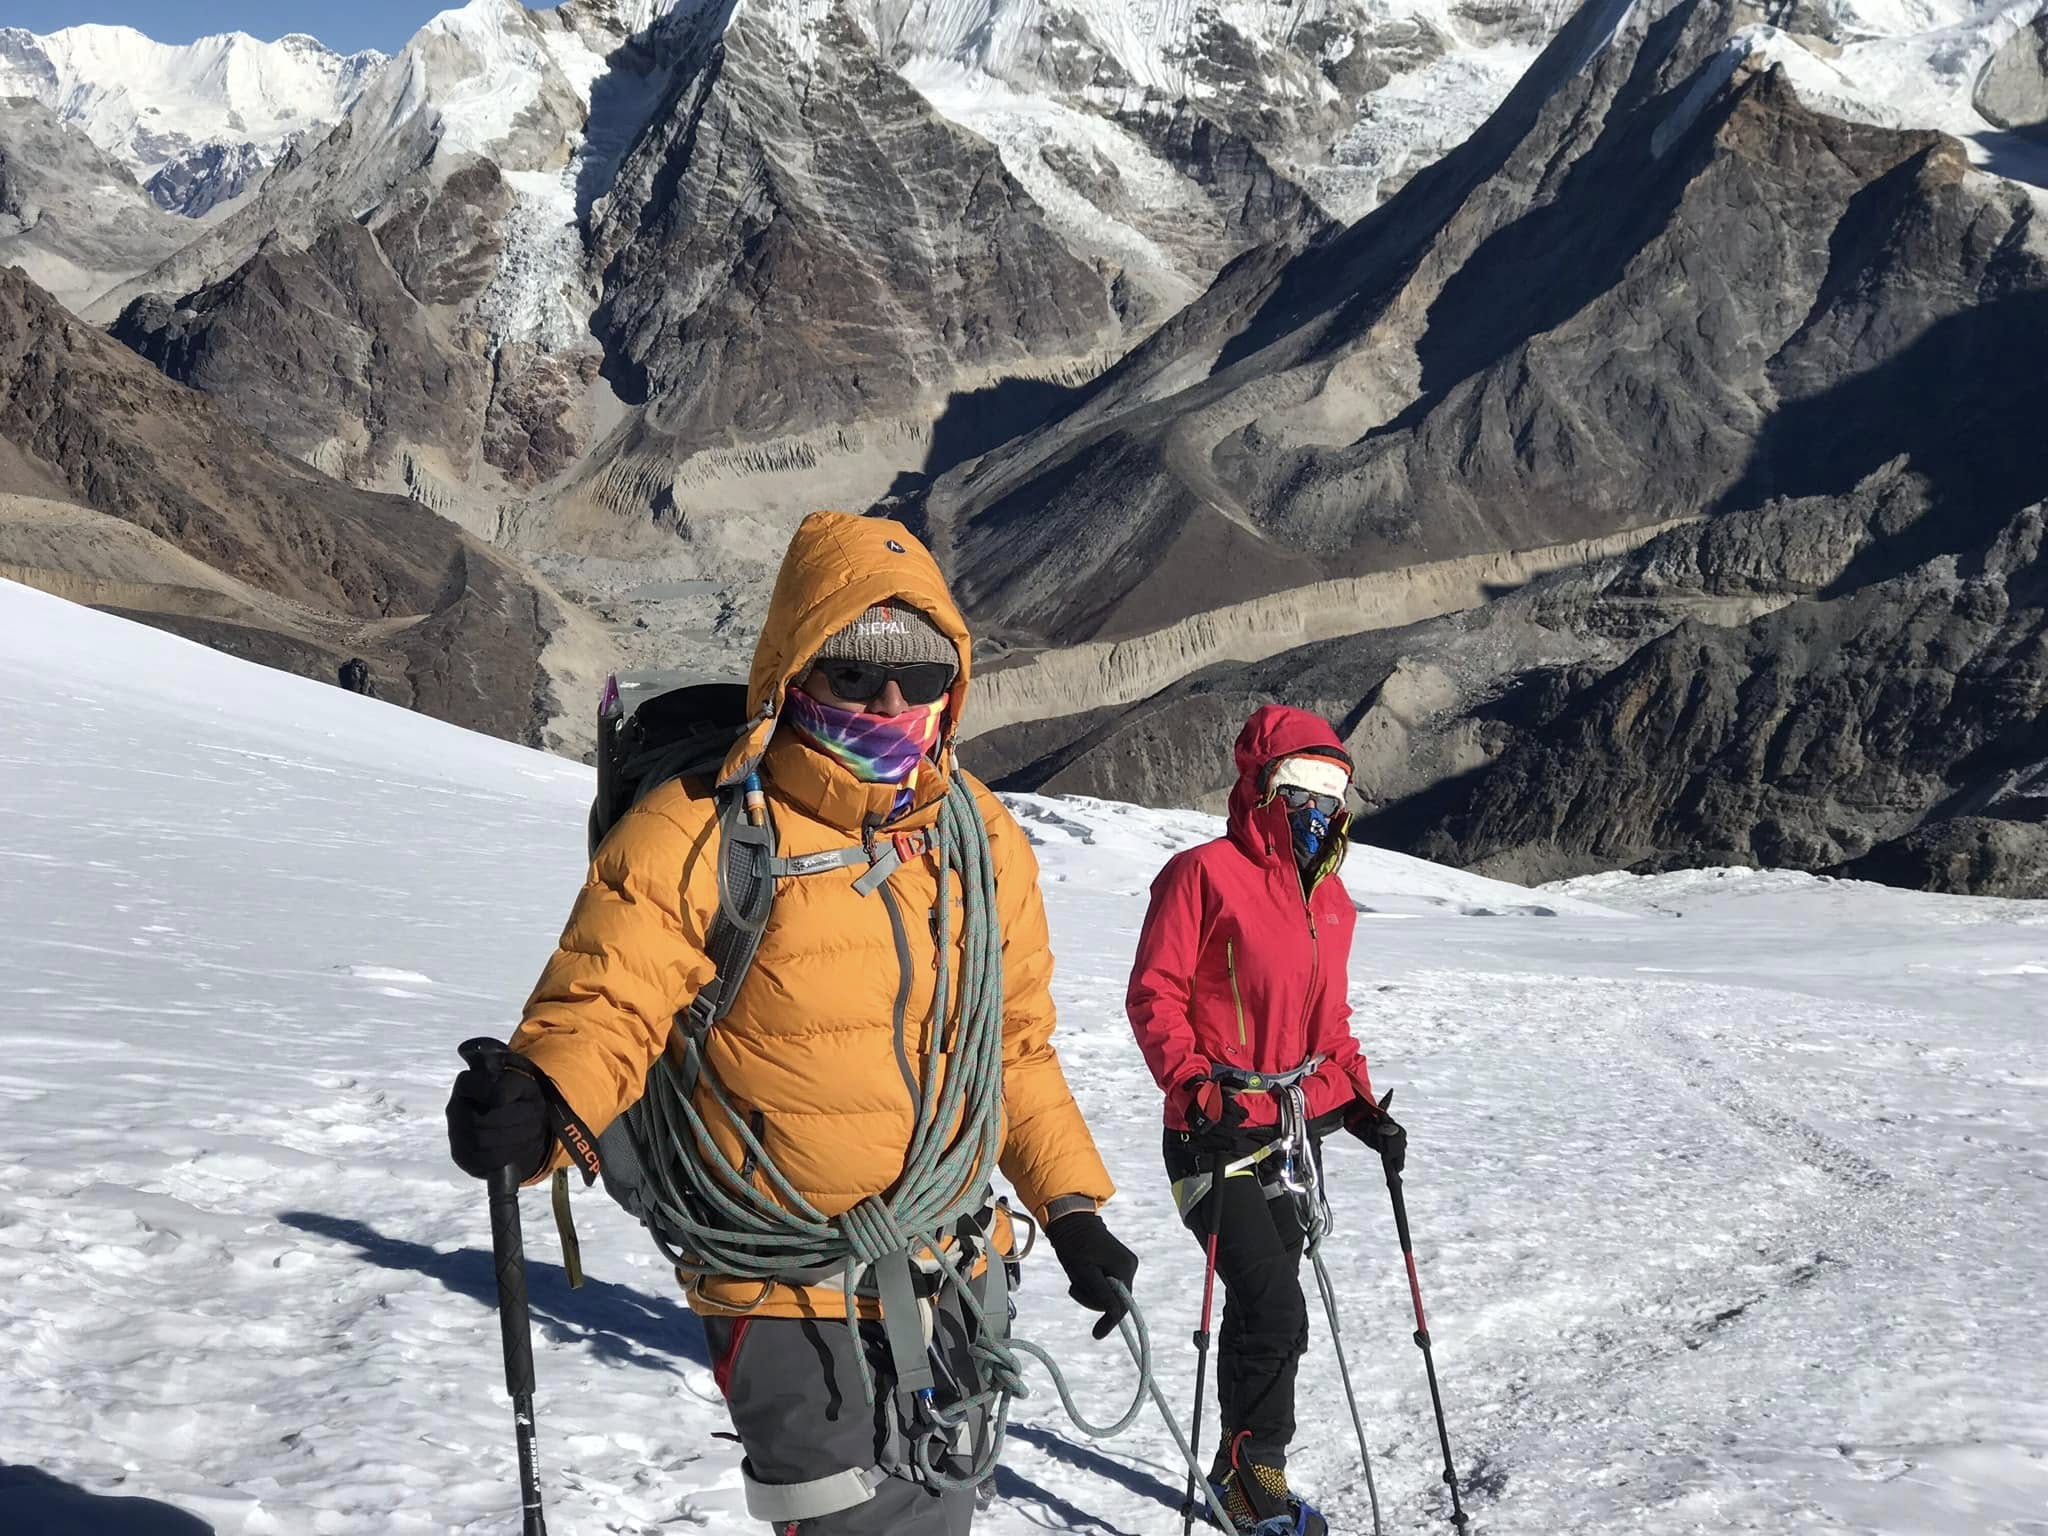
Most trips begin on an established trekking route. You walk through mountain villages, stay in tea houses, and gradually make your way towards Base Camp or High Camp.
The approach is an important part of the climb. You may spend several days gaining altitude slowly, with rest or acclimatization days along the way. This gives your body time to adjust before the team moves higher.
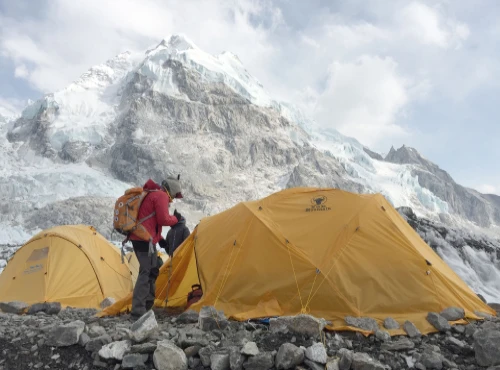
As you reach Base Camp or High Camp, the experience begins to change. Tea houses may be replaced by tents, and the focus shifts towards preparing for the summit. Your guide will check your equipment and provide practical training.
The summit attempt usually begins late at night or early in the morning. Depending on the peak, the route may include snow, glaciers, rocky terrain, or sections supported by fixed ropes before the team descends carefully to camp.
Trekking, Peak Climbing and Expeditions
A high-altitude trek mainly follows walking trails and usually does not require climbing equipment.
Peak climbing adds a summit attempt and may involve snow or ice, crampons, fixed ropes, and basic climbing techniques.
A full mountaineering expedition is generally longer and more complex. It may involve several high camps, larger support teams, advanced climbing skills, and weeks spent on the mountain.
Peak climbing sits between trekking and a major expedition. It allows experienced trekkers to enter mountaineering without beginning with one of Nepal’s highest or most technical mountains.
How Difficult Is Peak Climbing in Reality?
The difficulty of a peak cannot be judged by altitude alone.
A lower peak with steep or technical sections may be harder than a higher peak with a more gradual route. Weather, snow conditions, itinerary length, acclimatization, and previous experience can also affect how difficult the climb feels.
For most first-time climbers, the challenge does not come from one difficult section. It comes from several factors working together.
Physical Difficulty
Peak climbing normally begins with several days of trekking. By the time you reach Base Camp or High Camp, your legs may already be tired from the approach.
Summit day can involve many hours of climbing followed by a long descent. You need enough endurance not only to reach the top but also to return safely while maintaining your balance and concentration.
Being able to complete one long hike is not enough. The real test is whether you can continue walking and climbing after several consecutive days in the mountains.
Altitude Difficulty
At high altitude, even a steady slope can feel exhausting. Your pace becomes slower, recovery takes longer, and your sleep or appetite may be affected.
Everyone responds to altitude differently. Someone who is very fit at home may still struggle if they ascend too quickly or do not acclimatize well.
A technically straightforward peak can therefore become difficult because of its elevation. This is why a well-paced itinerary is just as important as physical fitness.
Technical Difficulty
Many beginner peaks require basic mountaineering skills rather than advanced climbing techniques.
The individual movements may not be highly complicated, but performing them on the mountain can feel different from practicing near camp. You may be wearing thick gloves, moving in darkness, and trying to stay focused while cold and tired.
Your guide will manage the route and main rope systems, but you still need enough concentration to use your equipment correctly and follow instructions.
Mental Difficulty
The mental side of peak climbing is easy to underestimate.
You may need to leave a warm sleeping bag in the middle of the night, eat when you have little appetite, and continue moving slowly in cold and uncertain conditions.
Some parts of the route may also feel steep or exposed, especially if you are uncomfortable with heights.
You also need to accept that weather, altitude, team pace, or route conditions may end the climb before the summit. Staying calm and communicating honestly are important parts of the experience.
What Does Summit Day Actually Feel Like?
Summit day often begins quietly. You put on several layers, check your equipment, and begin walking by headlamp while the mountains around you remain hidden in the dark.
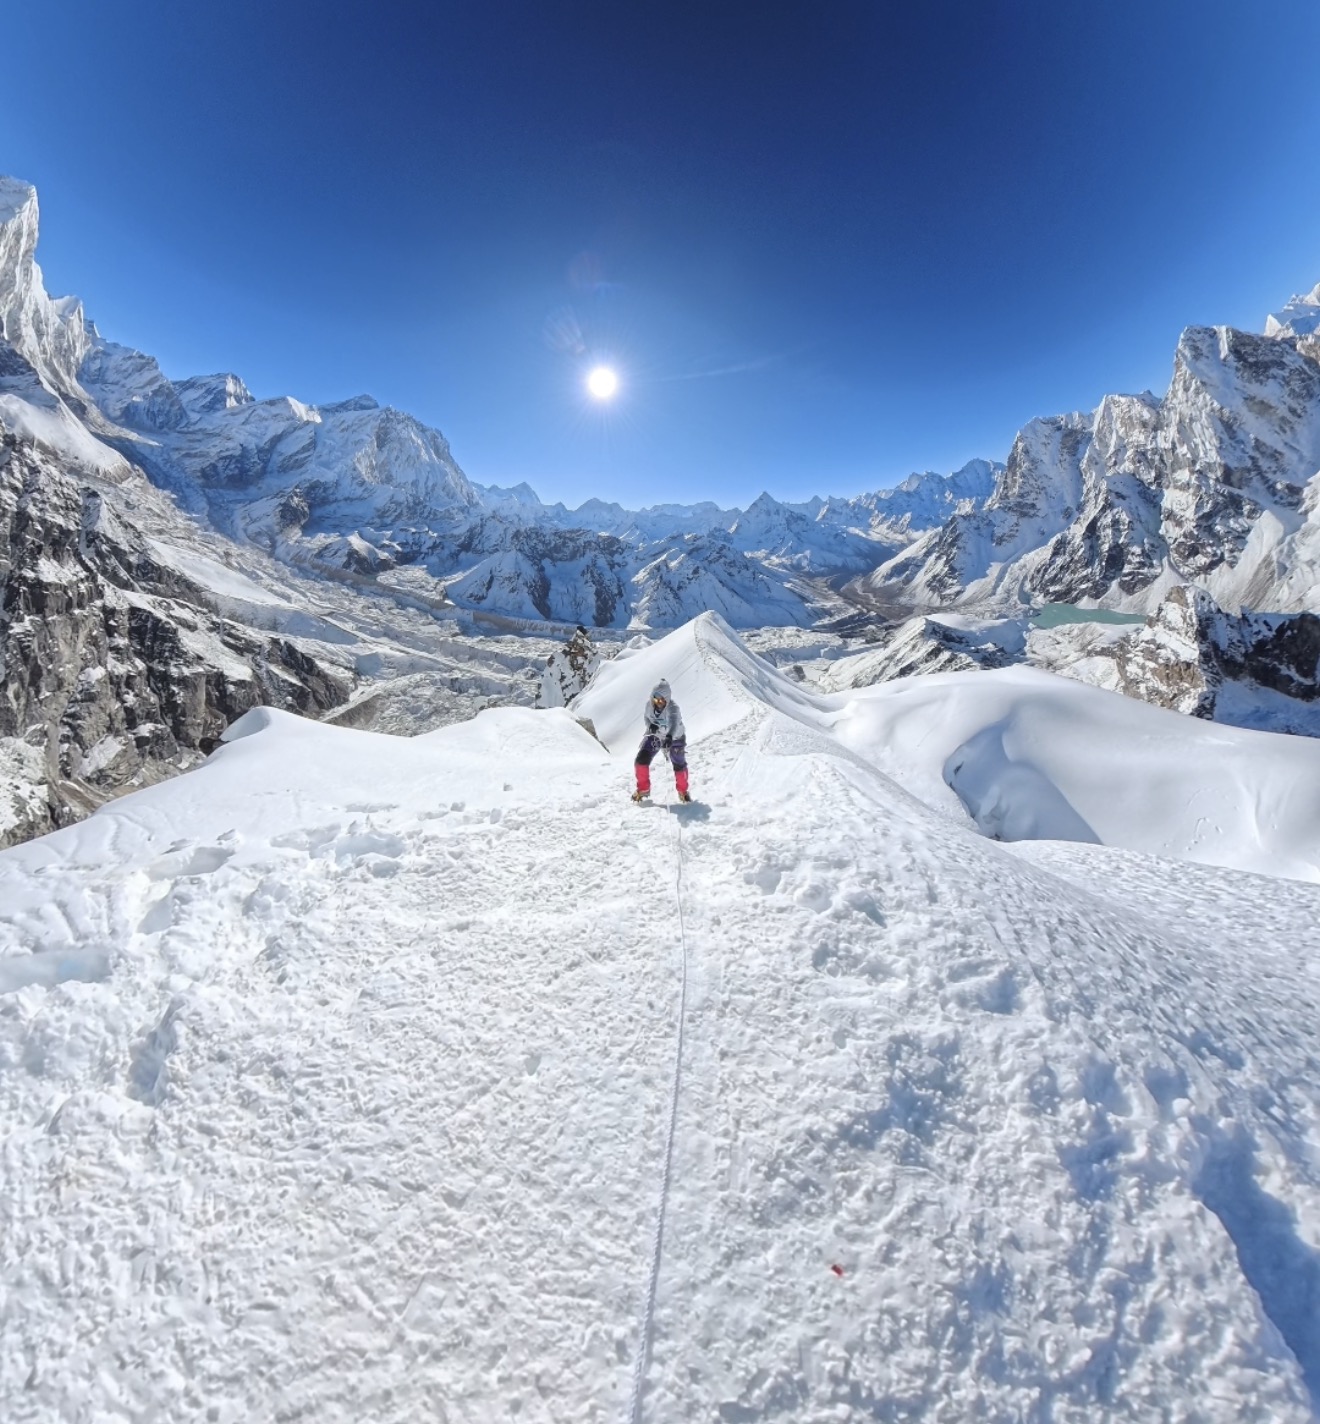
The pace is normally slow and controlled. Moving too quickly at altitude can leave you exhausted early, so the team takes short breaks while the guides check the route and observe how everyone is coping.
As the sky becomes lighter, you begin to see the slope ahead and the surrounding mountains. This can be one of the most memorable parts of the climb, but the effort does not disappear. Cold hands, heavy legs, and slow breathing may continue towards the summit.
Reaching the top can feel emotional after several days of preparation. However, the climb is not over. The descent still requires patience and concentration, and many first-time climbers find it more tiring than expected.
Do You Need Previous Climbing Experience?
Previous climbing experience is not mandatory for every beginner-friendly peak in Nepal.
However, having no climbing experience is different from having no mountain experience.
You should already be comfortable walking uphill for several hours, trekking on uneven trails, and continuing for several days in a row. Previous experience above 4,000 meters can also be helpful because it gives you some idea of how your body responds to altitude.
Your comfort on steep or exposed terrain matters as well. Moving across snow, ice, or a narrow section may feel unfamiliar, even when you are secured to a rope.
You do not need to be fearless, but you should be able to remain calm and follow instructions carefully.
Taking a climbing course before traveling to Nepal can be useful, especially if your chosen peak includes glacier travel or steeper fixed-rope sections. It gives you more time to practice when you are not already tired or affected by altitude.
A course is not compulsory for every beginner-friendly peak. What matters most is choosing a climb that matches your experience and arriving with realistic expectations.
What Skills Will You Learn?
Before the summit attempt, your guide will show you how to use the equipment needed for the route. This may include:
- Walking in crampons
- Wearing and adjusting a harness
- Clipping into a safety rope
- Climbing with an ascender or jumar
- Descending on a fixed rope
You may also practice moving safely on snow, keeping enough distance from other climbers, and communicating as part of a rope team.
The equipment may feel awkward at first, especially when wearing thick gloves and mountaineering boots. Use the training time to ask questions, adjust your gear, and repeat each movement until you understand it.
Your guide will manage the route, rope systems, and safety decisions. Your responsibility is to use the equipment correctly, communicate honestly, and avoid rushing.
You do not need to arrive as a mountaineer. But you should arrive physically prepared, willing to learn, and realistic about what can be learned during a short training session.
How Do You Choose Your First Peak?
The best first peak is not always the lowest or most popular. A suitable choice depends on your fitness, trekking experience, available time, and the type of climbing experience you want.
Start by looking at the full route, not only the summit altitude. One peak may have a gradual approach but a long summit day, while another may be lower but involve steeper terrain or more fixed-rope climbing.
Your previous mountain experience also matters. If you have completed several high-altitude treks, you may be comfortable with a longer or more demanding route.
If this is your first time above 4,000 meters, a less technical peak with a gradual itinerary and enough time to acclimatize may be more sensible.
Consider what you want from the climb as well. Some peaks mainly offer the experience of reaching a Himalayan summit. Others involve more glacier travel, ropes, and technical movement.
The right peak should challenge you without depending on perfect conditions or a rushed itinerary. A responsible operator should ask about your fitness, trekking background, and altitude experience before recommending one.
Beginner Peaks in Nepal Compared
These peaks offer different introductions to Himalayan climbing. Some are challenging mainly because of their altitude and long approach, while others involve steeper terrain, glaciers, or more fixed-rope climbing.
| Peak | Elevation | Main challenge | May suit |
|---|---|---|---|
| Yala Peak | Around 5,500 m | Steep walking, altitude, and changing snow conditions | Trekkers looking for a shorter introduction to Himalayan climbing |
| Mera Peak | 6,470 m | High altitude and a long approach | Strong trekkers who prefer a less technical normal route |
| Island Peak | 6,165 m | Glacier travel, fixed ropes, and a steep summit section | First-time climbers wanting more hands-on climbing experience |
| Lobuche East | 6,090 m | Steeper and more technical terrain | Fit trekkers with strong high-altitude experience |
| Pisang Peak | 6,091 m | Rock slabs, steep sections, and variable conditions | Climbers already comfortable on steeper terrain |
Note: Published elevations for Yala Peak vary, so it is commonly described as being around 5,500 meters.
Yala Peak
Yala Peak is often considered an accessible introduction to climbing because it is lower than the other peaks in this comparison and is reached through the Langtang Valley.
However, it should not be treated as an ordinary extension of the trek. The climb may still involve snow, loose ground, cold conditions, steep walking, and a tiring summit day.
It can be a practical option for trekkers who want a shorter first climbing experience without immediately attempting a 6,000-meter summit.
Mera Peak
Mera Peak is often described as less technical on its normal route, but its altitude is the main challenge.
At 6,470 meters, it is the highest peak in this comparison. The journey usually includes a long approach and requires enough time for gradual acclimatization.
Mera Peak may appeal to strong trekkers who are comfortable spending more days at altitude but prefer a route with less steep technical climbing.
Island Peak
Island Peak, also known as Imja Tse, is one of the best-known introductory peaks in the Everest region. The usual approach passes through Lukla, Namche Bazaar, Dingboche, and Chhukung.
If Island Peak is the one you're leaning toward, our guide on the best time to climb Island Peak goes deeper into month-by-month snow and route conditions.
Compared with Mera Peak, Island Peak normally involves more climbing equipment, glacier travel, fixed ropes, and a steeper final section.
It can provide a clearer introduction to technical mountaineering for someone who wants more than a straightforward snow climb.
Lobuche East
Lobuche East is generally a more demanding first peak. The route is steeper and may require greater confidence when using crampons, ropes, and other climbing equipment on mixed terrain.
It is located in the Khumbu region and can be approached through the main Everest trail or the Gokyo side.
It may be suitable for a very fit trekker with strong high-altitude experience, but it is not usually the gentlest introduction to peak climbing.
Pisang Peak
Pisang Peak rises above the Manang Valley along the Annapurna Circuit. Its route includes steep sections and large rock slabs that can become more difficult in wet or snowy conditions.
This makes it a more technical choice than some other introductory peaks. It is generally better suited to someone who already feels comfortable on steep terrain.
Use this comparison as a starting point, not a fixed ranking. The easiest peak on paper may not be the best first peak for your fitness, experience, available time, or comfort on technical terrain.
How to Train for Your First Peak Climb
Your training should prepare you for the effort you will face in Nepal: long uphill walks, several trekking days in a row, a demanding summit attempt, and a tiring descent.
General gym fitness can help, but it should not be your only preparation. Regular uphill walking, supported by endurance and strength training, will better prepare your body for moving in the mountains.
When hills are not easily available, stairs, an inclined treadmill, cycling, or running can help. However, try to include actual hiking whenever possible.
1. Build Your Endurance
Walking should form the base of your training. Begin with distances you can manage comfortably, then gradually increase the duration and uphill sections.
Cycling, jogging, swimming, and other aerobic exercises can improve your overall endurance, but they should support rather than fully replace hiking.
You need to become comfortable walking for several hours, not only completing shorter and more intense workouts.
2. Strengthen Your Legs and Core
Strong legs are important for both climbing and descending. During a long descent, tired muscles still need to control each step and keep you balanced.
Exercises such as squats, lunges, step-ups, calf raises, and controlled stair climbing can help build useful strength.
Core exercises can also improve your balance while carrying a backpack and walking over uneven terrain.
3. Train With a Daypack
Once you have developed some basic fitness, begin training with the backpack you expect to carry during the trek.
Start with a light load and increase the weight gradually. The aim is not to carry the heaviest pack possible. It is to become comfortable walking uphill with the water, clothing, snacks, and personal equipment you will normally carry.
Avoid adding too much weight too quickly, as your muscles and joints need time to adjust.
4. Practice Consecutive Hiking Days
One difficult hike does not fully prepare you for a journey that continues day after day.
As your trip approaches, try completing longer walks on two consecutive days. The second day will show how well you can keep moving when your legs are already tired, which is closer to the reality of an approach trek.
You should finish most training sessions tired but still in control. Consistent training, gradual progress, and proper recovery will prepare you better than a few extreme workouts.
Acclimatization and Altitude Safety
Altitude is one of the biggest challenges of peak climbing in Nepal. As you move higher, lower air pressure means less oxygen is available with each breath, and your body needs time to adjust.
Good fitness does not protect you from altitude sickness. A strong and experienced trekker can still develop symptoms if the ascent is too fast.
This is why following a gradual itinerary matters more than trying to reach Base Camp quickly.
For a closer look at symptoms, prevention, and treatment, see our full guide to altitude sickness.
Why Acclimatization Matters
Acclimatization is the gradual process of your body adapting to lower oxygen levels.
Rest days and smaller increases in sleeping altitude give your body more time to adjust before you move higher.
After 3,000 meters, the Himalayan Rescue Association advises limiting daily increases in sleeping altitude to around 300 to 400 meters.
The exact pace may vary between people. Acclimatization days should not be treated as spare days that can automatically be removed to shorten the trip.
When Should You Stop Ascending?
A headache combined with unusual tiredness, dizziness, nausea, or loss of appetite may be an early sign of acute mountain sickness.
Tell your guide when symptoms appear rather than hiding them to protect the summit plan. You should not move to a higher sleeping altitude while experiencing symptoms of altitude illness.
If symptoms become worse despite resting at the same elevation, descending is the safest response.
Confusion, difficulty walking straight, or breathlessness while resting are more serious warning signs and require immediate action.
Why Turning Back Is Sometimes the Right Decision
A guide may stop the climb because of worsening symptoms, slow progress, changing weather, or unsafe route conditions.
That decision can be disappointing after several days of preparation, but continuing upward is never more important than returning safely.
Being honest about how you feel is part of responsible climbing. Reaching the summit is one possible outcome, but recognizing when to rest or descend is also part of mountaineering.
What Equipment Do You Need?
The exact equipment depends on the peak, season, and current route conditions.
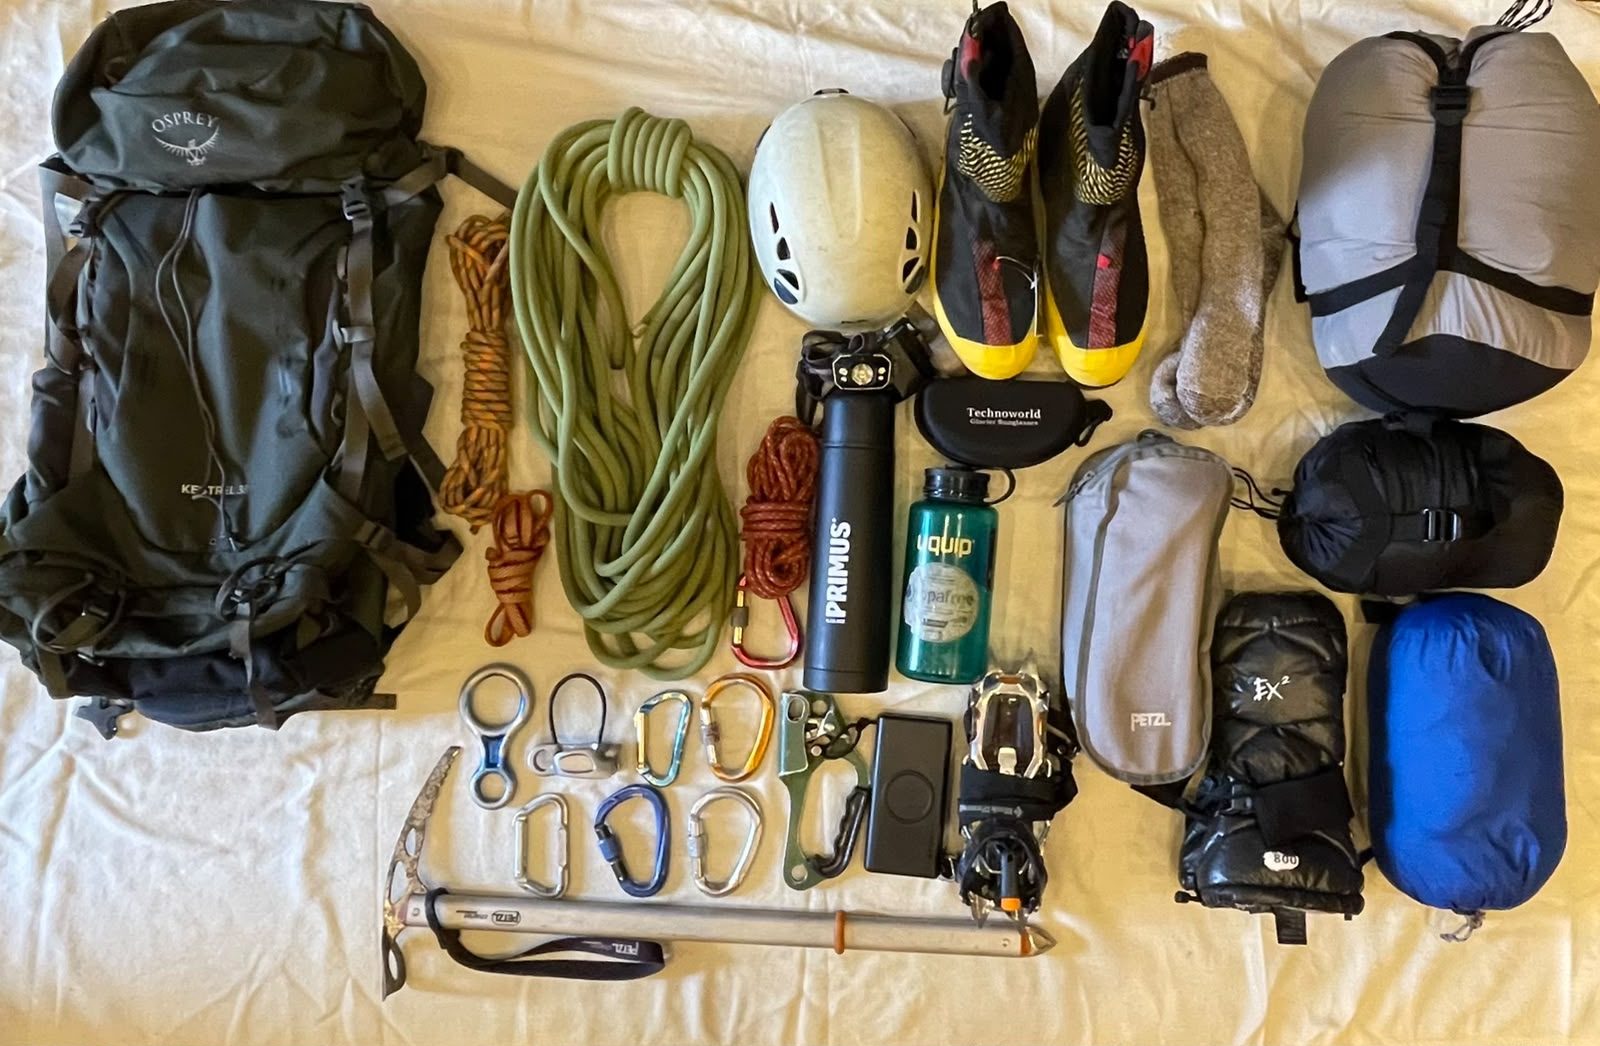
A climb involving glacier travel or steeper fixed-rope sections may require more technical gear than a straightforward snow ascent.
Before the trip, your operator should provide a detailed packing list. It should clearly explain what is included in the package, what can be rented, and what you need to bring yourself.
1. Personal Trekking Gear
Most of your trekking equipment will be similar to what you would carry on a high-altitude trek:
- Warm base, mid, and outer layers
- Waterproof jacket and trousers
- Insulated gloves with spare liners
- Warm hat and sun hat
- Sunglasses and sunscreen
- Suitable sleeping bag
- Headlamp with spare batteries
- Comfortable daypack
- Trekking poles
Your clothing and equipment should match the altitude, weather, terrain, and length of your chosen route.
2. Personal Climbing Gear
Depending on the peak, you may also need:
- Mountaineering boots
- Crampons
- Climbing helmet
- Harness
- Ascender or jumar
- Carabiners
- Descending device
- Ice axe
Some operators provide the full set of technical equipment. Others provide only shared gear or charge separately for rentals.
Check the package details rather than assuming everything is included.
3. Group and Camping Equipment
The guide and climbing team normally arrange the shared equipment required for the route. This may include:
- Climbing ropes
- Snow or ice anchors
- Tents and camping equipment
- Cooking equipment for camping-based routes
- Emergency communication equipment
- First-aid and safety supplies
A route using tea houses with one night at High Camp will require a different setup from a climb involving several nights of camping.
Renting Climbing Gear in Nepal
Technical climbing gear can often be rented in Nepal, but availability alone is not enough. Each item should fit properly, suit the route, and be in good condition.
Boot and crampon compatibility is especially important. Crampons use different binding systems, and not every system fits every mountaineering boot.
Ask the operator or rental shop to fit and check the boots and crampons together before you leave for the mountain.
For safety equipment such as helmets, harnesses, crampons, and ascenders, check that the items meet recognized UIAA or equivalent standards. Rental equipment should also be inspected for damage, excessive wear, or missing parts.
Whenever possible, bring the personal items that depend most on comfort and fit, particularly your boots, socks, gloves, and base layers.
Poorly fitting equipment may seem manageable during a short fitting but become painful or difficult to use after several hours in cold conditions.
Permits and Guide Requirements
Peak climbing in Nepal may require several permits issued by Nepal Mountaineering Association (NMA). The exact documents depend on the selected peak, the approach route, and the protected or restricted areas you enter.
Your operator should arrange the required permits and explain what is included in the package before the trip.
Climbing and Route Permits
A climbing permit is normally required for the selected peak. The fee and issuing process may vary depending on the mountain and climbing season.
However, the climbing permit usually does not cover the complete journey. Depending on the route, you may also need:
- A national park or conservation-area entry permit
- A TIMS card
- A local entry permit
- A restricted-area permit, where applicable
Do You Need a Guide?
Yes, a government-licensed guide is required for peak climbing in Nepal.
For the normal trek, you may travel with a licensed trekking guide. However, a trekking guide and a climbing guide do not always have the same skills or responsibilities.
The summit section should be led by an experienced climbing guide who understands the route, climbing equipment, rope systems, weather conditions, altitude risks, and emergency procedures.
Before booking, ask your operator who will guide the trekking section and who will lead the summit attempt. These roles may be handled by the same person, but this should be clearly explained in advance.
Restricted-Area Permits
Most commonly chosen beginner peaks do not require a restricted-area permit unless the approach enters a controlled region.
Restricted-area permits are separate from climbing permits, TIMS cards, and national park or conservation-area permits. They must normally be arranged through a registered trekking agency.
Before booking, ask your operator to provide the complete permit list and confirm which fees are included.
Note: Permit rules and charges can change. Check the current requirements for your exact peak and route rather than relying on an old itinerary or price list.
Best Time for Peak Climbing in Nepal
Spring and autumn are the main climbing seasons for most beginner peaks in Nepal. These line up closely with the best time to visit Nepal more broadly, though climbing conditions at altitude can differ from what you'd expect on a lower-elevation trek.
Spring Climbing Season
Spring generally runs from March to May and is one of Nepal’s busiest climbing periods.
Daytime temperatures gradually become warmer, and the longer daylight hours can make the approach trek and camp life more comfortable.
However, conditions can still change quickly. Fresh snowfall, afternoon clouds, and seasonal storms may affect the route, particularly at higher elevations.
Spring may suit climbers who prefer slightly warmer conditions, although popular trails and climbing camps can be busier.
Autumn Climbing Season
Autumn generally runs from September to November, following the main monsoon period.
October and November often bring clearer skies and better mountain visibility. Trails are also generally drier than during the monsoon.
Temperatures become colder as the season progresses, especially at Base Camp, High Camp, and during early-morning summit attempts.
Autumn may suit climbers who value clearer views and drier trails but are prepared for colder conditions.
Can You Climb in Winter or Monsoon?
Climbing is possible on some peaks during winter and the monsoon, but these seasons are usually less suitable for first-time climbers.
Winter brings colder temperatures, shorter days, and the possibility of deeper snow or more difficult camp conditions. Some routes may become harder to access or operate safely.
The monsoon generally lasts from June to September and brings most of Nepal’s annual rainfall.
Wet trails, cloud cover, poor visibility, transport delays, and changing route conditions can make the approach and summit attempt more complicated.
Conditions are not the same across Nepal. Areas such as Manang and Mustang receive less monsoon rain because they lie in the Himalayan rain shadow.
Before booking, ask your operator about the usual weather, recent snow and route conditions, camp arrangements, and transport reliability for your chosen peak.
A general seasonal label should be a starting point, not the only reason for choosing your climbing dates.
How Much Does Peak Climbing in Nepal Cost?
There is no fixed price for peak climbing in Nepal. The cost depends on the peak, itinerary length, group size, transport, permits, guide support, accommodation, meals, camping, and equipment included.
As a rough 2026 reference:
- Yala Peak: around USD 1,150 to USD 1,750
- Mera Peak: around USD 1,600 to USD 2,600
- Island Peak: around USD 1,900 to USD 2,800
Private or premium packages may cost more than USD 3,500.
Packages for the same peak can still have different prices. Cheaper options may use shared transport, have shorter itineraries, or exclude meals and equipment rental. Higher-priced packages may include domestic flights, extra acclimatization days, more porter or camping support, and a lower climber-to-guide ratio.
Group departures can reduce some shared costs, but permits, flights, accommodation, meals, equipment, and personal expenses are usually charged per climber.
What Should a Peak-Climbing Package Include?
The exact equipment depends on the peak, season, and current route conditions. For a full item-by-item breakdown of what to bring, rent, or expect your operator to supply, see our complete gear checklist for peak climbing in Nepal.
Before comparing prices, check whether the package includes:
- Climbing and route permits
- An experienced climbing guide
- Trekking and climbing accommodation
- Meals during the trek and at camp
- Ground transport or domestic flights
- Porters and camping support
- Shared climbing equipment
- Staff wages and insurance
- Government taxes
- Emergency communication and trip coordination
Personal travel insurance, technical-equipment rental, tips, snacks, drinks, hot showers, charging, and expenses caused by weather or transport delays are often excluded.
Compare the full itinerary, acclimatization time, guide support, inclusions, and exclusions before deciding. A cheaper price may leave you with more expenses during the trip.
Travel Insurance for Peak Climbing
Standard travel insurance may not automatically cover peak climbing.
Before buying a policy, check that it covers the highest altitude of your route and the type of climbing activity you will be doing. A policy that covers normal trekking may not cover the use of ropes, crampons, glaciers, or a summit attempt.
You should also check whether emergency medical treatment, helicopter evacuation, trip interruption, and delays are included.
Read the policy wording carefully and tell the insurer the exact peak and maximum elevation. Do not rely only on a general statement such as “adventure activities included.”
Carry a copy of your insurance details during the trip and make sure your operator knows how to contact the insurer if an emergency occurs.
How to Choose a Responsible Climbing Operator
A climbing operator should do more than arrange permits and assign a guide.
The itinerary, climbing team, equipment, and safety planning can all affect your experience on the mountain.
Start by asking who will lead the summit attempt. A trekking guide may manage the approach, but the climbing section should be led by someone with experience on your chosen peak and route.
Next, review the itinerary carefully. It should allow enough time to gain altitude gradually, practise with the equipment, and adjust the plan if conditions change.
Be cautious if important acclimatization days have been removed simply to make the trip shorter or cheaper.
Ask for a written list of package inclusions, exclusions, equipment rentals, and additional costs.
Emergency planning is equally important. Ask how the team communicates from the mountain, what happens if someone develops altitude symptoms, and how an evacuation would be arranged.
The company should also provide appropriate insurance and support for its guides and other staff.
Before booking, check:
- Who will lead the summit attempt
- The climber-to-guide ratio
- The number of acclimatisation and contingency days
- Whether the equipment is suitable and properly maintained
- How emergencies and evacuations are handled
- Whether staff are insured and properly supported
- What the package includes and excludes
Do not choose a company only because it offers the lowest price or advertises a high summit-success rate.
A responsible operator should be honest about the difficulty, possible delays, and the chance that weather, altitude, or route conditions may prevent the team from reaching the summit.
Final Thoughts
Your first peak climb in Nepal is not simply a higher or harder trek.
It introduces you to new equipment, unfamiliar terrain, colder conditions, and the responsibility of making careful decisions in the mountains.
You do not need years of mountaineering experience to begin. But you do need a peak that matches your ability, enough time to acclimatize, proper preparation, and a guide whose safety decisions you are willing to follow.
Reaching the summit can be deeply rewarding, but it is not the only measure of a successful climb.
You may also learn how to move on snow, use climbing equipment, manage tiredness, and remain calm when conditions change.
Sometimes the correct decision is to slow down, wait, or turn back. Understanding and respecting those decisions is an important part of learning to climb.
If you're not sure which peak matches your fitness and experience, our team can put together a tailor-made itinerary once we know a bit more about your background.
Mr. Lachhuman Tamang – A Pioneer in Trekking and Mountaineering
Call us on WhatsApp+977 9860455963OrChat with us